Getting a Google Adsense account is too tough nowadays. And even if you get an approval, struggling with 403 Forbidden error is a next headache. In this post, I will cover up how to solve this issue.

When do you get 403 Forbidden error?
403 Forbidden error occurs mostly for new AdSense users. Users whose AdSense application was initially rejected and later got approved on reapplying will get this error mostly. You would have even received an Adsense approval message just like the one below saying that ” Your account has been approved and ads will go live within few hours”.
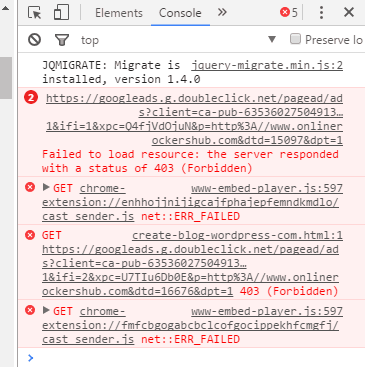
But even after 48 hours, you may not see the ads. You will see a blank ad. If you check your website by right clicking -> Inspect -> Console , you will notice a 403 Forbidden error.
Why does this 403 Forbidden error occur?
This occurs because your application was rejected initially. So Adsense crawlers will be instructed not to deliver ads to your website. But later you have reapplied and got your account approved . But, Adsense crawlers may not be instructed about this approval. This is probably a technical error at Adsense server.
How to fix 403 Forbidden error?
1) Check your Adsense code:
The first thing you will have to do is, check if your AdSense code is exactly same as the one created at your Adsense account. You can get the AdSense code on your page byright clicking -> view page source ( Ctrl + U) . An HTML page will open. Use find option and check if the AdSense code is same.

2) Add your website at Adsense account:
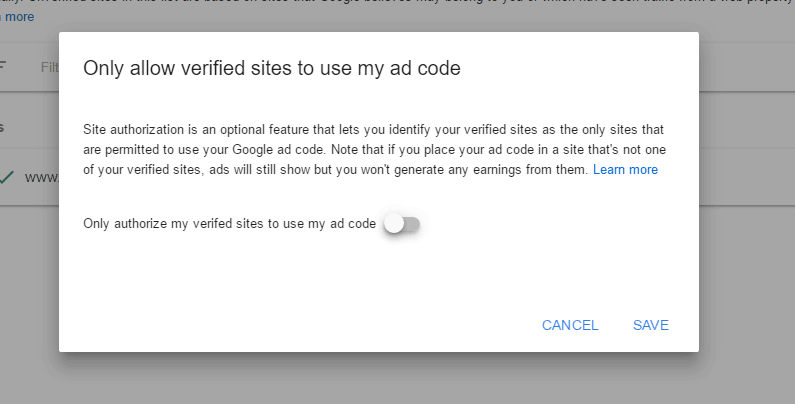
Now go to Adsense account, Click the Gear icon -> Settings -> My sites -> Manage sites and add your website. Click the three dots icon and select authorization and check if ” Only Authorize my verified sites to use my ad code” is off.

3) Check with your hosting service:
Certain hosting services like Namecheap would have a mod rule applied. If you report them this issue, then they will whitelist your domain.
4) Switch off Cloudflare Rocketscript :
If your website uses CloudFlare , then you must make sure that you switch off the Rocketscript . Because Rocketscript will break AdSense code from displaying. Go to your CloudFlare account, go to Speed tab and check if the Rocket Loader is Off.
5) Report this at Adsense forum:
Now, move on to Google Adsense forum , and create a new thread stating this issue. So that, experts can check if your site has any other problems.
6) Use Adsense troubleshooter:
Visit Adsense Troubleshooter and then fill up the questions asked. So that, you will get an opportunity to file a ticket. Now, an AdSense Officer will directly contact you through email. Now, he will check out this issue and he will manually approve your account and then ads will start displaying within 24 hours.
Some genius will try to go to step 6 directly.
Let me tell you,why you should not go to step 6 directly ?
These 5 steps are common steps followed by AdSense experts to resolve this issue.
If you directly file a ticket and explain Adsense officer, then he will give ask you to do them one by one. However, each of his replies will take hours.
Why do you need to waste your precious traffic just because of silly ideas? So go to step 6 only after finishing the remaining 5 steps.


Comments
Post a Comment